

Drywall forms the smooth ceilings and walls in most homes. It’s durable, easy to install, and gives rooms a clean, finished look.
However, drywall can still be damaged by water, impact, or mold. Once cracks, stains, or holes appear, replacing damaged drywall keeps your home safe and looking great.
This guide walks you through how to replace drywall step by step. It’s simple if done properly, and professionals like Any Hour Water and Fire can help after major wall damage.
Inspect the Damage
Start by checking how bad the damage is. Small dents or cracks may only need patching. But if you notice:
- Large holes
- Water stains
- Sagging or soft spots
- Mold growth
…it’s time to replace that section completely.
Use a flashlight to check for hidden issues. If the wall feels soft or smells musty, it’s been exposed to moisture and needs removal.
Gather Your Tools and Materials
Drywall replacement doesn’t require many tools. Here’s what you’ll need:
- Utility knife
- Drywall saw
- Measuring tape
- Screwdriver or drill
- Drywall screws
- Joint compound (mud)
- Drywall tape
- Sandpaper or sanding sponge
- New drywall sheet
- Primer and paint
Having your tools ready before starting saves time and effort.
Prepare the Work Area
Before cutting or removing drywall:
- Cover floors with plastic sheets or drop cloths.
- Move furniture away from the work zone.
- Wear gloves, goggles, and a dust mask.
- Turn off power if working near switches or outlets.
Cutting into walls can expose electrical wires, so safety comes first.
Cut Out the Damaged Section
Cut around the damaged area using a utility knife or drywall saw. Keep the lines straight — this makes fitting a new piece easier.
If the damage is near a stud, cut to the middle of it for strong support. Remove loose insulation, nails, and debris before continuing.
Measure and Cut the New Drywall
Measure the hole carefully and cut your replacement piece slightly smaller to fit snugly. Score and snap the drywall with a utility knife, then trim rough edges.
Dry-fit the piece before securing it — this ensures proper alignment.
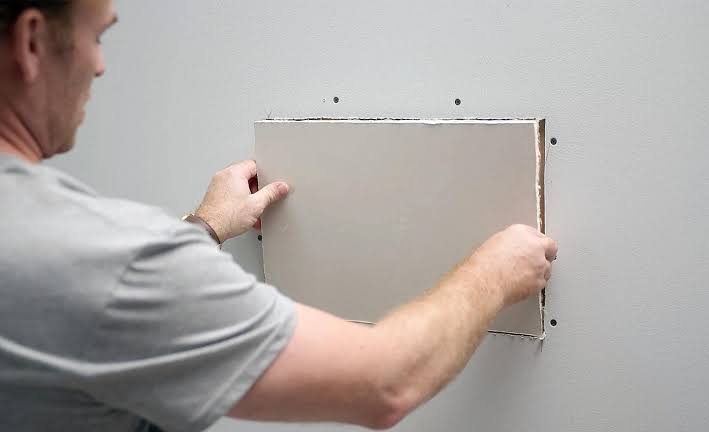
Install the New Drywall
Place the new piece in the hole and secure it with drywall screws.
- Space screws every 6 inches along the edges.
- Space screws every 12 inches in the center.
Drive screws just below the surface but don’t break the paper layer. The patch should sit level with the existing wall.
Apply Drywall Tape
Cover seams with drywall tape to blend the new section with the old wall. You can use self-adhesive mesh or paper tape — both work well.
Apply the tape firmly over joints and corners, making sure it’s flat and smooth to avoid bumps later.
Apply Joint Compound
Spread a thin coat of joint compound (mud) over the tape using a putty knife. Let the first coat dry completely before applying a second and third coat.
Each layer should be slightly wider to create a seamless finish. Drying time usually ranges between 8–24 hours, depending on humidity.
Feather the edges so it blends with the wall.
Step 9: Sand for a Smooth Finish
After the compound dries, gently sand the area with fine-grit sandpaper or a sanding sponge.
Wipe off dust with a damp cloth before painting.
If you see uneven spots, apply another thin coat, let it dry, and sand again.
Patience here results in a professional-looking finish.
Step 10: Prime and Paint
Once the surface is smooth, it’s time to paint.
- Apply a primer first to help the paint stick and hide color differences.
- Then apply two coats of paint for full coverage.
After drying, your wall will look brand new.
When to Replace vs. Repair
Small cracks or dents can be patched, but replacement is best when:
- The drywall is soft, crumbling, or water-damaged.
- There’s visible mold or mildew.
- Cracks reappear after patching.
- Damage covers a large area (over 2 feet).
If you’re uncertain, have a professional inspect the area. They can detect hidden damage behind the wall.
Common Causes of Drywall Damage
Understanding what causes drywall issues can help you prevent them:
- Water leaks from pipes or roofs
- Accidental impacts from furniture or doors
- House settling, which causes cracks
- Mold growth from trapped moisture
- Poor installation leading to weak joints
Regular inspection and early repair help avoid bigger problems later.
Benefits of Professional Drywall Replacement
DIY repair works for small jobs, but professionals are best for larger or water-damaged areas.
Why professional help matters:
- Detects hidden issues behind the wall
- Uses correct materials and techniques
- Ensures a smooth, long-lasting finish
- Handles cleanup safely
Companies like Any Hour Water and Fire specialize in drywall replacement after water or fire damage, restoring your home quickly and efficiently.
Preventing Future Drywall Damage
Keep your walls in top condition with a few preventive measures:
- Fix plumbing leaks immediately.
- Use door stoppers to prevent impact holes.
- Maintain low indoor humidity.
- Insulate walls in damp areas like basements.
- Clean and repaint regularly.
Routine care keeps your walls strong, smooth, and beautiful for years.
Final Thoughts
Replacing drywall isn’t difficult if you take your time and follow each step carefully.
Start by inspecting the damage, cut precisely, install your patch snugly, and finish with smooth coats of compound and paint.
For severe water, mold, or structural damage, contact professionals like Any Hour Water and Fire.
They handle everything from drywall replacement to full restoration, keeping your home safe and looking its best.
Replacing damaged drywall isn’t just about appearance, it’s about protecting your home’s structure and your family’s health. Do it right, and your walls will be solid, smooth, and ready for anything.