

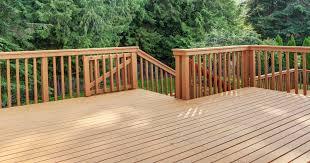
Decks often get all the love in summer—barbecues, sunbathing, and evening gatherings under string lights. But come winter, many homeowners abandon their decking to the mercy of snow, ice, and freezing temperatures.
This seasonal neglect can lead to serious issues. Warped boards, cracked planks, and moisture-related rot don’t just compromise appearance—they weaken the structure and shorten the deck’s lifespan.
The good news? With the right preparation, your deck can make it through winter unscathed. Below is a step-by-step guide to winterizing your decking the right way, ensuring it stays safe, attractive, and functional year-round.
Step 1: Clear It Off Completely
Start with a clean slate. Remove all furniture, grills, planters, and décor. These items can trap moisture and prevent airflow—two of the biggest culprits of mold growth and surface discoloration.
Be sure to clear debris from corners, stairs, and under railings. Dead leaves and pine needles hold water and cause tannin stains, especially on wood decking.
Taking the time to empty and clean your deck surface thoroughly sets the foundation for proper treatment and inspection.
Step 2: Sweep, Wash, and Inspect
Begin by sweeping the entire deck to remove loose dirt, leaves, and any remaining debris. Then wash the surface using a specialized decking cleaner (or a mix of water and mild soap for composite materials).
Use a stiff brush to scrub between boards and around fasteners. For wood decks, a power washer on a gentle setting can help lift embedded grime—but too much pressure can damage the wood fibers, so proceed with caution.
Once dry, inspect every inch of the deck. Look for:
- Cracks or splinters
- Raised nails or loose screws
- Mold or mildew
- Discoloration
- Soft spots or sagging boards
If anything looks off, now’s the time to make repairs—not in the middle of winter when conditions worsen.
Professional teams like AG Exterior Solutions often perform fall maintenance checks for clients who want peace of mind before the freeze sets in.
Step 3: Repair and Replace Damaged Areas
No matter how minor the damage may seem, cold temperatures will make it worse. Cracks expand, moisture gets trapped, and frost causes further splitting.
Secure any loose boards, tighten hardware, and sand down splintered edges. Replace rotting or warped planks entirely—patchwork repairs don’t hold up under snow load.
If you have a wood deck, look out for signs of insect damage as well. These spots are more vulnerable to moisture infiltration during winter.
It may be tempting to postpone repairs until spring, but acting now can save you both money and safety concerns later.
Step 4: Protect the Surface
For wood decking, applying a high-quality sealant or water repellent is one of the most important winter prep steps you can take.
Choose a product rated for your region’s climate—preferably one that resists mold and mildew and allows the wood to breathe. Sealing helps repel moisture, prevents warping, and reduces the chances of frost damage.
If your deck is composite, you likely don’t need a sealant—but a protective cleaning treatment can still reduce staining and surface abrasion.
Apply your chosen product in dry weather, and allow ample time for it to cure before precipitation. Most sealants require 24–48 hours of dry conditions, so check the forecast before starting.
Step 5: Address Drainage and Snow Management
Poor drainage is one of the leading causes of winter damage. Make sure water can flow off the deck and away from the home.
Check gutters, downspouts, and grading around the deck to prevent pooling. Clogged systems can overflow and drip directly onto decking, causing localized freezing and repeated expansion.
During winter, avoid using metal shovels on the deck surface—they can gouge or scratch finishes. Use a plastic shovel or a stiff broom to remove snow, and always push in the direction of the boards.
Never allow snow or ice to pile up for extended periods. The weight and moisture will eventually penetrate even the best finishes.
Step 6: Don’t Forget the Railings and Hardware
Your decking isn’t the only thing under pressure in winter—rails, stairs, and fasteners take a beating too.
Tighten loose handrails and check that balusters are secure. If you use decorative caps or lighting on posts, make sure they’re weatherproof and properly sealed.
Metal components—like screws, nails, or brackets—should be inspected for rust or corrosion. Replacing these before winter prevents structural issues and protects surrounding wood from staining or decay.
These smaller touches are often overlooked, but they’re critical for long-term durability.
Step 7: Consider Covering
If you live in an area with harsh winters, consider covering your deck for the season. This can be as simple as a waterproof tarp secured around the perimeter or as involved as a custom-built canopy.
Covers help prevent snow buildup, block UV damage, and keep the surface cleaner for spring. Just be sure that the cover allows airflow—trapped moisture is worse than exposure in some cases.
Avoid using plastic sheeting directly on the surface, as it can cause condensation buildup underneath. Always elevate or secure covers to promote air movement.
Step 8: Keep an Eye on It
Even after winterizing, your deck may need occasional check-ins during the colder months.
After major snowfalls, remove accumulation. After ice storms, inspect for damage. And after thawing periods, check for water pooling or debris collection.
A little vigilance now prevents expensive repairs later.
Homeowners who work with experienced crews like AG Exterior Solutions often receive seasonal maintenance recommendations to stay ahead of issues before they escalate.
Final Word: Protect the Space That Protects Your Lifestyle
A deck is more than wood and nails—it’s part of your home’s personality and a key player in your outdoor lifestyle. With a little preparation, it can stand strong against winter’s harshest blows and greet you in the spring just as inviting as you left it.
Winterizing decking isn’t about adding work to your fall to-do list—it’s about preserving one of your most valuable outdoor assets.
Take the time now. And when warm weather returns, you’ll be ready to enjoy every moment without repair delays or safety concerns.
Because a well-prepared deck isn’t just a surface—it’s a foundation for memory-making, season after season.