

Why Outdoor Movies Work So Well
Outdoor movies turn ordinary spaces into shared experiences. They’re perfect for neighborhood block parties, school fundraisers, church gatherings, apartment community events, and backyard birthdays. The formula is simple: a good screen, a bright projector, clear audio, and a comfy layout. When you dial in those basics, the night feels effortless for guests and hosts alike.
This guide walks you through planning from start to finish, based on what event rental teams like RentForEvent see every week across Los Angeles. You’ll learn how to choose the right screen and projector, set up sound, arrange seating, and avoid common pitfalls that can derail an otherwise great idea.
Step 1: Choose the Right Screen Size
Your audience size and viewing distance determine the screen. Bigger isn’t always better—clarity matters more than raw scale.
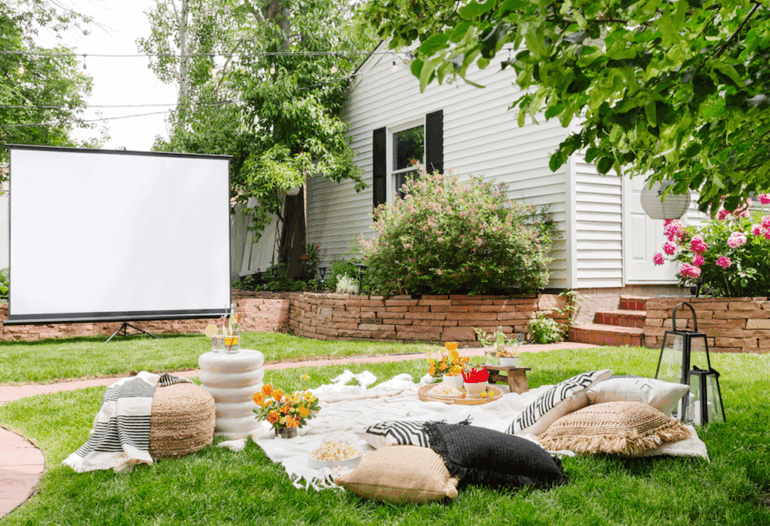
- Backyard parties (10–30 guests): 10–14 ft diagonal works great.
- Community events (30–100 guests): 16–20 ft diagonal.
- Large fields (100–300+ guests): 24 ft+ for a “mini-festival” feel.
If you’re aiming for a turnkey option with delivery, setup, and weather-aware planning, look for a local provider that offers outdoor movie screen rental in Los Angeles. They’ll match screen size to your audience and space, handle inflation or framing, and secure the system for wind.
Pro tip: Keep the lowest edge of the screen at least 3–4 feet off the ground so guests in the back rows can see over heads, chairs, or blankets.
Step 2: Understand Projector Brightness and Throw
Projector brightness is measured in lumens. The darker your environment, the fewer lumens you need; the more ambient light (streetlights, storefronts, or a late sunset), the more lumens you should plan for.
- Backyards and shaded courtyards: 3,500–5,000 lumens.
- Parks or parking lots with nearby lighting: 6,000–8,000 lumens.
- Large screens or partial daylight conditions: 10,000+ lumens with professional optics.
Throw distance is how far the projector needs to be from the screen. Short-throw lenses allow you to set up closer when space is tight; standard lenses need more distance. Ask your rental partner to confirm the “throw ratio” for your chosen screen size and to mark a projector position on your site map.
Pro tip: Start movies after civil twilight (about 20–30 minutes after sunset) so the image pops. Even a bright projector struggles against a bright sky.
Step 3: Build Audio That Reaches the Back Row
People will forgive a small visual flaw; they won’t forgive muddy or quiet sound. Outdoor spaces absorb and scatter audio, so plan accordingly.
- Small gatherings: A pair of powered speakers on stands, angled inward to avoid echo off buildings.
- Medium events: Add a small mixer to balance music, movie audio, and a microphone for announcements.
- Large spaces: Consider a distributed PA (additional speakers halfway back) to cover the crowd evenly.
Avoid pointing speakers directly at nearby homes late at night. Angle them toward the audience area, and keep volume balanced across the entire seating field.
Accessibility tip: If budget allows, provide a few assistive listening devices or reserve a front-row “accessibility zone” where audio is strongest.
Step 4: Plan Power and Cables Safely
Outdoor events often need multiple dedicated circuits, especially with high-lumen projectors, air blowers (for inflatable screens), and sound systems.
- Power: Avoid daisy-chaining too many devices. Use separate circuits for projector and audio to reduce hum or dropouts.
- Cabling: Gaffer tape or cable ramps wherever foot traffic crosses. Glow tape helps at night.
- Generators: If you must use a generator, place it downwind and far enough from guests to reduce noise.
Pro tip: Label each cable at both ends. It saves you minutes during setup and avoids panic during troubleshooting.
Step 5: Seating Layout and Sight Lines
Sight lines make or break the viewing experience. Plan your field like a shallow fan:
- Front zone: Blankets and low lawn chairs.
- Middle zone: Standard camp chairs.
- Rear zone: Taller chairs or standing.
Leave aisles for easy entry and exit, and create a stroller/wheelchair path along one side. Add low pathway lights—not bright enough to wash the screen, just enough to guide guests safely.
Step 6: Manage Ambient Light and Sound
City lighting is the silent villain. If possible, position the screen so streetlights and storefronts sit behind the audience, not behind the screen or shining onto it. Ask property management if any nearby lights can be temporarily dimmed. Consider using black drape “wings” to block light from the sides.
For sound, scout the site at night. If you’re near traffic or an active plaza, plan a bit more speaker power and a slightly higher overall level—without blasting the first few rows.
Step 7: Weather and Wind Planning
Los Angeles evenings are usually friendly, but wind can pick up near the coast or in canyons. Inflatable screens must be staked or weighted properly. Keep an eye on forecasts and set a wind threshold for “pause” or “cancel.” Have a backup date or indoor fallback if this is a fundraising or ticketed event.
Pro tip: Bring sandbags or water barrels as extra ballast, and keep guy lines clearly marked.
Step 8: Content, Playback, and Licensing
Playback can be as simple as a laptop with HDMI output. Disable screen savers and notifications, download files locally, and test audio routing. If you’re streaming, hardwire the connection rather than relying on Wi-Fi.
For public showings (parks, schools, community events), confirm licensing. Studios and distributors offer straightforward public performance licenses. Backyard birthday parties typically don’t require one, but always verify if in doubt.
Step 9: Run of Show and Staffing
A simple timeline reduces stress:
- T–2:00 hrs: Arrive, unload, and begin screen and projector setup.
- T–1:15 hrs: Place speakers, run cables, and do a first sound test.
- T–0:45 hrs: Focus projector, check color/contrast, and set audio levels with trailer content.
- T–0:20 hrs: Open seating, play a curated pre-show playlist at a comfortable level.
- T–0:05 hrs: Host welcome message, quick announcements, volume check.
- Showtime: Fade music, start the movie, monitor levels and wind.
- Wrap: Power down in reverse order; coil and pack cables cleanly.
For bigger events, a two-person crew is ideal: one manages video and screen; the other runs audio and guest flow. RentForEvent crews often assign a lead tech and an assistant for smooth, quiet operations.
Step 10: Create a Memorable Experience
Small touches elevate the night:
- A themed photo spot with a simple backdrop.
- Cozy blankets in a basket for guests who forgot theirs.
- Individually packaged snacks or a popcorn cart with compostable bags.
- Quiet lawn games off to the side for kids who fidget.
Keep trash and recycling visible yet unobtrusive, and provide a water station. If you’re hosting on a field, consider a portable restroom rental.
Troubleshooting Quick Guide
- Image is dim: Wait 10 more minutes after sunset, increase projector brightness, or reduce ambient light.
- Image is soft: Refocus the lens, square the projector to the screen, or shorten the throw distance.
- Audio hum: Use a ground lift on audio lines; isolate projector and audio on separate circuits.
- Wind wobble: Add ballast or reduce screen size if conditions worsen.
When to Bring in the Pros
If you’re hosting a community night, a fundraiser, or anything with 100+ guests, expert help pays for itself. A professional team can assess your site, right-size the gear, and handle setup, safety, and teardown without drama. That peace of mind is why so many organizers rely on RentForEvent for repeat movie nights across the city.
For screens, delivery, setup, and on-site support, book outdoor movie screen rental in Los Angeles early—summer weekends and school-year Fridays go fast. And if you need a bright, dependable projector that pairs perfectly with your screen size, lock in a projector and screen rental Los Angeles package to ensure your visuals are crisp from the front row to the back blanket.
Final Takeaway
Outdoor cinema is about connection. When guests can see the picture clearly, hear every line, and relax in a well-planned space, the evening feels effortless. Start with the right screen and projector, add balanced audio, and follow a simple timeline. With thoughtful planning—and a reliable rental partner like RentForEvent—your outdoor movie night won’t just work; it’ll become the event everyone asks you to host again next month.