

You’ve just pulled into your driveway after an amazing trip. The memories are fresh. But that beautiful RV of yours looks like it wrestled a mud puddle. You know the feeling. The thought of washing it feels like a monumental chore. I get it. But what if I told you there are some RV wash secret hacks that can make the whole process easier? I’ve spent years figuring out the best ways to get my rig sparkling without spending an entire weekend on it. These are my best RV wash secret hacks, and I promise they work. And if you’re short on time or prefer a professional touch, checking out a car wash in Calgary can give your RV that spotless shine without the hassle.
Get Your Gear Ready Before You Start
Nothing kills your motivation faster than having to stop and find something. Before a single drop of water hits your RV, get your tool kit ready. It’s a simple step that makes a huge difference in your RV washing experience.
You’ll want to move your RV to a shady spot if possible. Washing in direct sunlight is a recipe for disaster. The sun will dry the soap on your finish before you can rinse it, leaving ugly spots and streaks everywhere.
If you don’t have a shady spot, try washing in the early morning or evening when the sun is less intense. Lay out all your cleaning supplies so they are within arm’s reach. This includes your garden hose with a spray nozzle, a bucket, RV-specific soap, and your chosen cleaning tools.
Having a second bucket filled with clean water for rinsing your brush or wash mitt is also a great idea. This helps prevent you from dragging loose dirt all over your clean surfaces. This two-bucket method is a professional detailer’s secret for a scratch-free finish.
The Right Cleaning Tools for the Job
Your choice of cleaning tools is important. You wouldn’t use a scouring pad on your car, right? The same logic applies to your RV or travel trailer, whose surfaces can be delicate.
A soft-bristle long brush with an extendable handle is your best friend. This lets you reach the high sides and the roof without straining your back. Proper care starts with using the right equipment to avoid doing more harm than good.
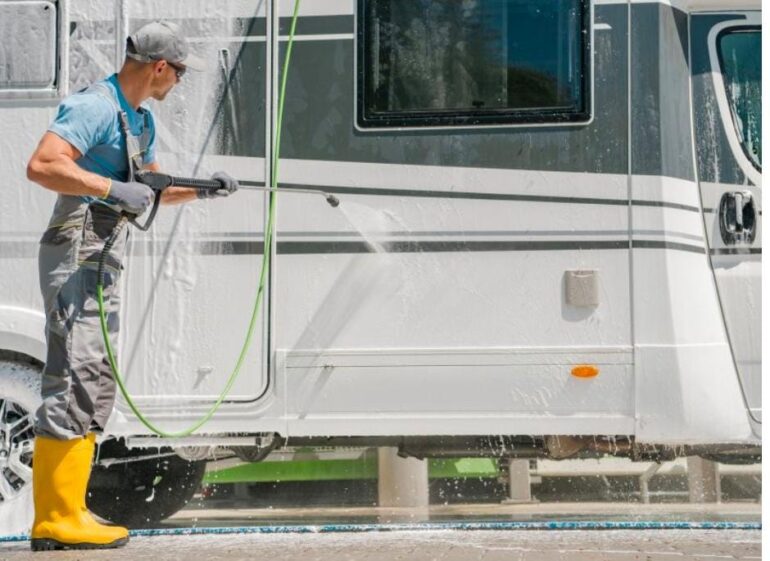
I’ve seen people use pressure washers, but you have to be very careful. A pressure washer can easily peel decals and damage paint or rubber seals around windows and vents. A standard hose with a good nozzle usually gives you all the pressure you need to remove dirt and grime without risking potential damage.
If you do use a pressure washer, use a wide-angle fan tip (40 degrees or more) and keep a safe distance from the surface. Avoid spraying directly at seams, seals, and graphics. The high-pressure water stream can force its way into places it shouldn’t, leading to water damage down the road.
For the lower sections of the RV that are easier to reach, a microfiber wash mitt is perfect. Microfiber is great because it can lift dirt particles instead of just pushing them around. This helps to prevent fine scratches in your RV’s finish, keeping it in good condition.
Keep a few clean microfiber towels handy so you can switch them out as they get dirty. Don’t forget about your RV wheels and tires. A separate, stiffer brush is great for scrubbing away brake dust and road grime from the RV wheels.
The Great Soap Debate
It might be tempting to just grab the dish soap from your kitchen. Please don’t do this. While dish soap is amazing at cutting through grease on your plates, it contains harsh chemicals that are not suitable for your RV.
Dish soap will strip away any protective wax, leaving your finish exposed to the elements like sun and rain. This can accelerate fading and oxidation, especially from UV damage. Always use an RV cleaner specifically made for RVs or cars.
These cleaning products are pH-balanced to be gentle on your rig’s finish and decals. Many of them even contain wax. A good wash and wax soap solution cleans your RV and adds a thin layer of UV protection in one easy step.
This approach saves you time and keeps your RV looking better for longer. There are many great RV products out there, including biodegradable options perfect for use at an RV campground where the water supply might drain into the ground. Reading reviews from other RV owners can help you pick the best one for your needs.
My Favourite RV Wash Secret Hacks
Over the years, I’ve picked up some amazing tips. These are the tricks that really cut down my cleaning time and improve the results. Some of them might sound a little strange, but trust me on this for an easier clean.
First, always wash your RV from the top down. It sounds like common sense, but it’s easy to forget when you have a harder time reaching the top. Gravity is your friend here; let it do some of the work for you.
Start with the RV roof and let all the dirty water and soapy water run down. If you wash the sides first, you’ll just have to clean them again after the grime from the roof streaks down them. This simple technique ensures you aren’t creating more work for yourself.
While performing roof cleaning, be extremely careful. An RV roof can get very slippery when it’s wet and soapy. Wear shoes with a good grip, and consider having a spotter on the ground for safety.
This is also a great time to check your roof seals as part of a routine maintenance schedule. Catching potential problems with your roof seals early can save you from costly water damage repairs later. A nice, clean roof is the foundation of a clean RV.
Tackling Bugs and Black Streaks
After a long trip, the front of your RV can look like an insect graveyard, and a simple RV wash won’t always cut it. These bug splatters can be incredibly tough to get off and can even etch into your paint. Here’s a trick: use damp dryer sheets as a bug remover.
Just let one sit in the buggy area for a few minutes to loosen dirt and bug remains. The fabric softener in the sheet helps break them down, letting you wipe them away easily with a microfiber towel. It’s a cheap and surprisingly effective solution to remove loose debris.
Black streaks are the bane of every RV owner’s existence. Those ugly streaks running down from your windows and roof lines are usually caused by rain washing residue from your roofing material. To fight them, you can buy a dedicated black streak remover, but there are other options.
For a quick fix, a simple mix of a quality all-purpose cleaner and hot water in a spray bottle works well. Just spray it on, let it sit for a minute to break down the grime, and then gently wipe it away with a cloth. For stubborn stains, you might need a bit more elbow grease or a second application.
Awning Cleaning and Care
Don’t forget your RV awning. A dirty, mildew-covered awning can ruin the look of an otherwise clean rig. Awning cleaning is a critical part of your routine maintenance.
First, fully extend the awning and spray it down with your garden hose to remove loose dirt. Then, apply an awning cleaner solution. You can find specific cleaning products for this, or a simple mix of mild soap and water can work.
Use a long brush to gently scrub both the top and bottom of the awning fabric. Pay special attention to any areas with mould, mildew, or tree sap. For tough spots, you may need a specialized product to remove mould without using corrosive chemicals that could damage the fabric.
Rinse the awning thoroughly with clean water, making sure to wash away all the soap solution. Let it dry completely before rolling it back up. Rolling up a damp awning is a surefire way to have mildew problems the next time you open it.
Getting Crystal Clear Windows and Shiny Chrome
Having clean windows makes a huge difference, both inside and out. The best way to get them streak-free is with a squeegee. After you’ve washed and rinsed the window, use a good-quality squeegee to wipe the water away.
Wipe the blade with a clean cloth after each pass for the best results. You’ll be left with perfectly clear, professional-looking windows. It’s a small detail that makes your entire travel trailer look much better.
Do you want that chrome bumper or your stainless steel appliances to really sparkle? A little baby oil on a soft cloth can work wonders. After cleaning, just apply a very thin layer and buff it to a brilliant shine, which can also help repel dirt.
Drying is Just as Important as Washing
You just spent all that time on your RV washing project. The last thing you want is to let it air dry. Air drying will leave mineral deposits from your water tank or water supply on your finish, creating annoying water spots.
Taking the time to properly dry your RV is a critical final step for a nice, clean look. A large, absorbent microfiber towel designed for drying cars works great. They can soak up a ton of water, making the job much quicker.
An even faster method, and another one of my favourite hacks, is to use an electric leaf blower. You can dry the entire RV in a fraction of the time, and the air stream helps prevent new dirt from settling on the wet surface. This is a game-changer, especially for larger rigs.
The leaf blower is also amazing for blowing water out of all the tight spaces, like around your window seals and trim. This prevents water from running down later and causing streaks. It also reduces the chance of water seeping into unwanted areas and causing potential problems.
Adding a Layer of Protection
Washing is for cleanliness, but waxing is for protection. Your RV’s exterior is constantly being attacked by the sun’s UV rays, which can cause bird droppings and tree sap to bake into the finish. Regular washing is your first line of defence, but a protective coating is the second.
A good coat of wax provides a sacrificial barrier, giving your rig a deep shine and important UV protection. A spray wax is a fast and easy option. You can apply it right after you wash while the RV is still a little damp.
For even longer-lasting protection, you’ll want to use a traditional paste or liquid wax. Applying this kind of wax is more work, but it generally only needs to be done once or twice a year. This kind of proper care helps maintain your RV’s value and appearance for years to come.
| Comparison of RV Protection Options | |||
|---|---|---|---|
| Protection Type | Application Time | Durability | Best For |
| Spray Wax | Quick (15-30 min) | Low (4-6 weeks) | Frequent, quick touch-ups between major washes. |
| Liquid/Paste Wax | Moderate (2-4 hours) | Medium (3-6 months) | Bi-annual application for solid, long-lasting protection. |
| Paint Sealant | Moderate (2-4 hours) | High (6-12 months) | Once-a-year protection for maximum durability against elements. |
Conclusion
Taking care of your RV doesn’t have to be an all-day job that you dread. With a little bit of planning and a few clever RV wash secret hacks, it can be a manageable and rewarding task. These tips will help you get a better result in less time.
From choosing the right soap to the final drying process, every step matters. A consistent routine maintenance schedule will keep your rig looking great and protect it from the elements. This prevents bigger issues from developing over time.
You can spend less time cleaning and more time planning your next adventure. Seeing your clean, shiny rig is a great feeling, and now you know how to get it there with these simple hacks. And if you’d rather leave the job to professionals, a trusted Calgary car wash can give your RV the sparkle it deserves. Happy travels.