



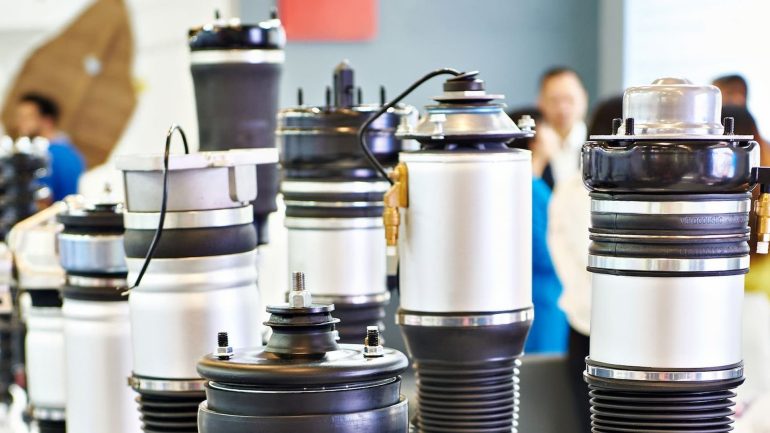
An air helper-spring problem is easier to solve when you treat the system as a chain: air source, valve, airline, fittings, air springs, brackets, and the truck’s existing suspension. A symptom may appear at one corner while the fault sits elsewhere.
For drivers comparing vehicle-specific hardware and control options, Retrue offers a useful place to review available configurations.
Before changing pressure or tightening hardware, confirm that the kit matches the exact vehicle configuration and that the installation follows its manufacturer’s instructions. air bags suspension kit options are vehicle-specific, so do not transfer pressure settings, brackets, or routing assumptions from a different application.
Air helper springs can help support a loaded suspension, but they do not change a vehicle’s GVWR, GCWR, or GAWR. They also do not increase tire, axle, braking, or legal payload ratings. Keep every load within the ratings on the vehicle and trailer labels. Air Lift’s FAQ makes the same distinction between added suspension support and a changed vehicle weight rating.
Start with a safe baseline
Park on level ground, apply the parking brake, chock as appropriate, and remove the load only if it can be done safely. Do not crawl beneath a vehicle supported only by a jack. If inspection requires working under the truck, support it correctly according to the vehicle manual.
Record the symptom before making an adjustment:
- Which side is low, and does it change with a load attached?
- What pressure is shown in each circuit before and after the truck sits?
- Does the noise occur while inflating, over bumps, during turns, or at full suspension movement?
- Was work recently performed on the suspension, tires, hitch, bed, or onboard air system?
Then inspect the kit’s applicable minimum and maximum pressure limits. Do not assume that a pressure range from another air-spring kit applies to yours. Firestone notes that its Ride-Rite kits have application-specific fitment and lists a maximum pressure for that product line; that is not a universal setting for all systems. Firestone Ride-Rite
Pressure loss: find the leak before replacing parts
A slow loss of pressure is commonly an air-path issue, but the affected corner is not automatically the leaking component. A shared fill circuit can let a leak influence both sides.
Inspect the simple connection points first
With the system at a safe test pressure specified by the kit maker, use a leak-detection solution on accessible connections: fill valves, push-to-connect fittings, tees, compressor connections, and the air-spring port. Bubbles that continue to grow point to a leak. Follow the manufacturer’s procedure for removing and reseating an airline; do not cut, force, or substitute parts unless the instructions allow it.
Also inspect airline routing from end to end. Look for a line that is pinched by a bracket, rubbed against a sharp edge, melted near exhaust heat, or stretched when the axle moves. Repairing only the visible damaged spot may not be enough if the route still creates the same contact.
Check the air spring and valve condition
Examine each air spring for cuts, abrasion, cracking, distorted shape, or contact with a bracket, tire, suspension component, or exhaust. Inspect the valve core and cap as well. A missing cap is not proof of a leak, but it can leave the valve exposed to contamination.
If an onboard compressor is installed, isolate whether pressure falls with the compressor system off. A faulty check valve, manifold, or control component can allow air to escape even when the air springs and manual fill valves appear sound. Consult that component’s instructions before disassembly.
After any repair, reinflate within the applicable limits, recheck with leak solution, and inspect again after the vehicle has sat. A repair is not confirmed just because the system holds pressure for a few minutes.
Uneven height: separate air-system faults from vehicle stance
First, measure rather than judge by eye. On level ground, measure matching points on the left and right sides, such as a repeatable location from wheel center to fender opening. Compare the unloaded condition with the same load placement each time.
Compare pressure and plumbing layout
If each air spring has a separate fill valve or independently controlled circuit, compare the pressures side to side. A low side with lower pressure may indicate a leak, restricted line, or control issue. A low side with equal pressure may point instead to installation alignment, a suspension issue, load distribution, or a vehicle that was already sitting unevenly.
A single-path system intentionally equalizes pressure between the two air springs. That configuration may not keep a side-to-side load balanced in the same way as independently controlled paths. Do not add tees, valves, or a second circuit without confirming that the kit and its instructions support the change.
Inspect brackets, fasteners, and clearances
Look for shifted brackets, loose or missing fasteners, bent hardware, or an air spring that is not centered as shown in the installation instructions. Check with the suspension at normal height and through the movement range specified by the manufacturer. A component that clears while parked can still touch during compression or rebound.
Do not use extra pressure to hide a severe lean, sagging factory spring, damaged shackle, worn bushing, or uneven cargo. The underlying truck suspension and the load still need attention.
Noise: identify the type and timing
Noise diagnosis improves when you describe the sound and recreate it safely. A hiss during inflation suggests air flow; a repeated compressor cycle may suggest a system that is trying to replace lost pressure. A clunk over bumps is more often a clearance, bracket, or hardware concern than an air-pressure setting.
Hissing or frequent compressor operation
Test fittings and valves for leaks, then inspect the compressor system according to its manual. Avoid repeatedly running a compressor to compensate for an unverified leak. That can obscure the fault and may place unnecessary demand on the air source.
Rubbing, squeaking, or scraping
Look for fresh rub marks on airlines, air springs, brackets, and nearby chassis components. Check for foreign material trapped near the air spring and for missing protective sleeves or clips that the kit instructions call for. Correct the routing and fastening method, then reinspect clearance after a short, controlled test drive.
Clunks or metallic knocks
Stop using the setup for towing or hauling until you have checked mounting hardware and suspension clearances. Follow the applicable torque sequence and values from the kit instructions; do not guess at torque or simply tighten every fastener harder. Recheck after the manufacturer’s recommended initial-use interval if one is specified.
A practical reinspection checklist
Use this after any adjustment, repair, or installation work:
- Confirm vehicle-specific fitment and the correct installation instructions.
- Verify pressure is within the kit’s stated limits for the current condition.
- Check both sides for leaks at valves, fittings, lines, and air-spring ports.
- Trace every airline for heat exposure, pinching, abrasion, and adequate movement clearance.
- Inspect air springs and brackets for contact marks, deformation, or shifted hardware.
- Measure left and right ride height on level ground with the load positioned consistently.
- Confirm that cargo, tongue weight, and trailer loading are balanced and remain within all vehicle and trailer ratings.
- Reinspect after a controlled drive and before the next loaded trip.
If pressure loss, a pronounced lean, damaged components, or repeated noise remains after these checks, pause the loaded use case and seek qualified service. For vehicle-specific components and related onboard-air equipment, start with the product documentation available from Retrue.
FAQ
Can I inflate one side more to correct an uneven load?
Only if the kit’s instructions permit independent side-to-side adjustment. First confirm the vehicle is on level ground, the load is placed correctly, and there is no leak, damaged suspension part, or bracket alignment problem.
Why does an air spring lose pressure only after towing?
Suspension movement can reveal an airline pinch, rubbing contact, or fitting issue that is not apparent while parked. Inspect the routing and clearances with the vehicle safely supported and follow the kit maker’s inspection procedure.
Will air helper springs raise my truck’s legal payload rating?
No. Air helper springs do not change vehicle weight ratings, including GVWR, GCWR, or GAWR. Air Lift’s FAQ advises that vehicle weight ratings should not be exceeded.
Is a clunk after installation normal?
Do not assume it is normal. Check for loose or shifted hardware, insufficient clearance, and contact between the air-spring assembly and nearby components. Use the manufacturer’s specified inspection and torque information.