

The installation of indoor security cameras requires finding the best place to install the camera, connecting the camera to the power supply, connecting it to Wi-Fi, configuring it using the manufacturer’s mobile application, and securing it with the correct screws and locking system for the maximum viewing angle. Most modern indoor camera systems are easy to install and can be done without the help of a professional. When installed correctly, the camera will be able to see critical areas, accurately detect motion, and offer a reliable real-time view.
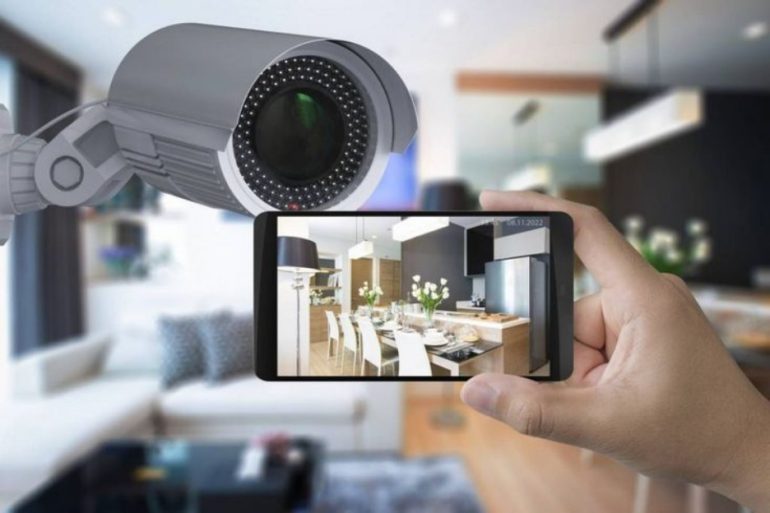
Whether you are adding a single camera or upgrading to a complete security camera system kansas city property owners trust, proper planning and professional setup are essential for reliable protection. A complete system combines strategically placed cameras, video recording, motion alerts, remote viewing, and monitoring features to help secure your home or business. Proper camera positioning improves coverage of entrances, driveways, living areas, and other vulnerable locations, while expert configuration enhances video quality, motion detection accuracy, and mobile access. With the right setup, you can monitor your property in real time, receive instant alerts, and access recorded footage whenever needed.
Step 1: Choose the Right Camera Location
The first step is to choose the optimum placement for your indoor security camera. Correct positioning is crucial for good footage.
Common locations include:
Site entrances and corridors
Living rooms
Nurseries
Home offices
Stairways
Valuable Areas
Set the camera up in a location that gives it good visibility of the room. Don’t place it directly facing bright windows, as this can cause glare and lower image quality. Install the camera at a suitable height that is not easily tampered with but allows a proper viewing angle.
Step 2: Check Wi-Fi Signal Strength
The majority of indoor security cams use a wireless Internet link. Check the location to ensure it has a strong wireless signal before installing the camera.
Check the signal strength in the installation area using the cell phone. Delay in video streams, interruptions, or poor quality video streams can occur due to weak connectivity.
If the signal is weak, then try:
Moving the camera closer to the router
Installing a Wi-Fi extender
Moving the router to a more central position
There needs to be a stable internet connection for reliable camera performance.
Step 3: Download the Camera App
Many manufacturers have an app that allows you to set up and manage the camera from your mobile device.
Download the camera maker’s official app. If necessary, make a new account and follow the directions on the screen.
Typically, the app will give you the ability to:
Connect the camera to Wi-Fi.
View live video feeds.
Adjust settings
Receive motion alerts
Access recorded footage
If connection problems occur, it will help to complete this step before mounting.
Step 4: Connect the Camera to Power
Indoor security cameras need to be connected to a power source unless they are rechargeable battery-powered.
Use the power adapter to plug the camera into a nearby power outlet. Turn on the camera, and wait for it to start up.
Flashlight or voice prompt alerts are displayed in many cameras, indicating they are ready for setup.
Make sure the power cord doesn’t become a tripping hazard and can be plugged into the outlet safely.
Step 5: Connect the Camera to Wi-Fi
Unlock the manufacturer’s app and follow directions to set up.
Generally, the process is characterized as follows:
Choosing a camera model.
Scanning a QR code.
Entering Wi-Fi credentials.
The application and camera.
Once connected, view the live feed and ensure that the camera is functioning properly.
Check if the connection does not occur:
Correct Wi-Fi password
Strong signal strength
Router compatibility
Camera firmware updates
If the pairing is successful, you can control and monitor the camera remotely.
Step 6: Test Camera Placement
While setting up, temporarily set the camera in the desired position and preview the video before making the permanent installation.
Look for:
Complete room coverage
Clear image quality
Proper viewing angle
Minimal glare
Good night vision.
Make necessary adjustments to the position. Testing first to prevent unnecessary drilling and remounting.
Step 7: Attach the Camera
After you are pleased with your location, securely place your camera.
Follow these steps:
Hold the mounting bracket against the wall or ceiling.
Use a pencil to indicate the locations of the screw holes.
If required, drill pilot holes.
When mounting to drywall, use wall anchors.
Tighten up the bracket with screws.
Attach the camera to the bracket.
Most of the indoor cameras have fine-tuning mounts that can be adjusted after installation.
Step 8: Organize and Secure Cables
Utilize a power cord with your camera; go around corners and walls.
There are several cable management possibilities:
Adhesive cable clips
Cable raceways
Cord covers
Never tighten cables or put them in a position where they can be compromised.
Step 9: Configure Camera Settings
Once installed, adjust the camera to suit your requirements.
Important settings include:
Motion Detection
Need to reduce pets, shadows, and minor movements from generating alerts, and use sensitivity adjustments.
Recording Schedule
Record continuously OR automatically (motion) record as needed.
Notification Settings
Allow “push” messages to alert when in motion.
Video Quality
Choose the right resolution depending on the internet speed and storage capacities.
Privacy Zones
Some cameras allow you to block out the parts of the shots that you don’t want others to see.
This is the last step, which is called the system test.
Step 10: Test the Entire System
Verify:
Live video streaming
Motion detection accuracy
Mobile notifications
Recording functionality
Night vision performance
Audio features
Regular testing will ensure that your security system reliably performs over time.
Tools and Materials Needed
Before the installation process, you should have a few items ready:
Indoor security camera
Power adapter/cable
Smartphone or computer
Wi-Fi connection
Installing screws and anchors in timber, blocks, stakes, etc.
Drill and screwdriver
Measuring tape
Use a pencil to indicate points.
Ladder if needed
Preparing in advance can smooth the installation process and make it quicker.
Maintenance Tips
To ensure that indoor security cameras work:
Regularly clean the camera lens.
Update the firmware.
Check cables for condition and damage.
Test motion detection periodically (once a month).
Check cloud/on-prem availability.
If it slows down, stop the camera and start it again.
Continuous maintenance will help maximize camera life and optimize camera performance.
Conclusion
Most homeowners can install home security camera without the assistance of professionals. To create an effective indoor monitoring system, the following steps can be taken: Choose the appropriate camera, make sure there’s a strong wi-fi signal, securely mount your camera, and adjust your camera configuration. Efficiently maintaining your cameras and carrying out regular maintenance and tests will ensure that they can continue to provide efficient surveillance and peace of mind for many years to come.
FAQs
Where do you want to put your indoor security camera?
Indoor security cameras should be positioned around entry points, hallways, living rooms, stairways, and other areas with a high density of people who conduct important activities.
How do outdoor security cameras work?
There are a few modern indoor cameras that need the internet to record remotely, alert users, and store footage on the cloud, while others should be able to record locally without the use of the internet.
- May I install the security cameras in my home myself?
Yes. Most of the interior security cameras come with easy installation instructions, which can be followed for DIY installation, along with mounting hardware and mobile applications.