

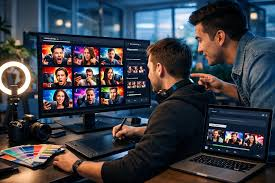
Creating YouTube thumbnails used to be one of the most time consuming parts of my content workflow. As a creator who focuses on visual storytelling, I always knew that a strong thumbnail could significantly improve click through rates, but the process of designing one from scratch often slowed me down. Over time, I started integrating AI tools into my workflow, and one tool in particular, PNG Maker, has completely changed how I approach thumbnail creation.
In this article, I want to share my full workflow for creating YouTube thumbnails using AI, with a focus on how I use PNG Maker to speed up production while maintaining visual consistency and quality.
Why Thumbnails Matter More Than Ever
Before diving into the workflow, it is important to understand why thumbnails deserve attention. On platforms like YouTube, thumbnails act as the first impression. Even if your content is excellent, a weak thumbnail can reduce visibility and engagement.
I used to spend hours in design software adjusting layers, removing backgrounds, and experimenting with layouts. The problem was not creativity. It was efficiency. That is where PNG Maker came in and reshaped my entire process.
Step 1: Planning the Visual Concept
Every thumbnail starts with a simple idea. I usually ask myself three questions:
What emotion should this thumbnail convey
What is the main subject
What visual contrast will make it stand out
Instead of jumping straight into design tools, I sketch the idea mentally and then move directly into generating assets using PNG Maker.
Step 2: Generating Core Assets with PNG Maker
This is where PNG Maker becomes essential. I use PNG Maker to generate high quality transparent PNG images that I can immediately place into my thumbnail layout.
For example, if I need a character expression, an object, or even a stylized icon, I describe it in PNG Maker and generate multiple variations. The key advantage is that PNG Maker outputs images with transparent backgrounds, which removes the need for manual background removal.
Because of this, I can skip one of the most tedious steps in traditional thumbnail design. PNG Maker allows me to focus on composition instead of technical cleanup.
I usually generate several options for each element. This gives me flexibility when assembling the final design.
Step 3: Cleaning and Refining Assets with Background Remover
Even with AI generated assets, there are times when I work with existing images such as screenshots, photos, or external references. This is where the built in Background Remover becomes extremely useful.
Instead of switching to another tool, I can quickly remove backgrounds from any image directly within PNG Maker. This keeps my workflow streamlined and consistent.
The Background Remover is especially helpful when I want to combine real images with AI generated elements. It produces clean edges and saves me from manual masking, which used to take a lot of time.
By using both PNG generation and background removal in one place, I can prepare all my assets without breaking focus.
Step 4: Composing the Thumbnail
Once I have my assets from PNG Maker, I move into composition. I typically use simple tools like Figma or Photoshop, but the process itself has become much faster thanks to PNG Maker.
Because all assets already have transparent backgrounds, I can drag and drop them into the canvas without additional editing. This allows me to experiment with layouts quickly.
I focus on three main elements:
Subject placement
Text readability
Color contrast
PNG Maker gives me flexibility here because I can always generate additional elements if something feels missing. Instead of forcing a design to work, I can iterate rapidly.
Step 5: Enhancing Visual Impact
After placing the main elements, I enhance the thumbnail by adding effects such as shadows, outlines, and lighting. Since PNG Maker provides clean cut assets, these effects look much more natural.
For example, adding a glow around a subject generated by PNG Maker creates a strong focal point. I also use color grading to ensure the thumbnail stands out against YouTube’s interface.
If I need additional visual elements, I go back to PNG Maker and generate supporting graphics like arrows, highlights, or background shapes.
Step 6: Testing Variations
One habit I developed after using PNG Maker is creating multiple thumbnail variations. Since generating assets is so fast, I no longer settle for a single design.
I often create two or three versions of a thumbnail and compare them. Small changes in expression, color, or layout can significantly impact performance.
PNG Maker makes this step practical because I can quickly regenerate assets without starting from scratch.
Step 7: Maintaining Style Consistency
Consistency is important for building a recognizable channel identity. PNG Maker helps me maintain a consistent visual style across thumbnails.
By reusing prompts, I can ensure that my thumbnails share a similar tone and aesthetic. This is especially useful for series content or recurring themes.
Over time, I built a small library of prompts that work well for my niche. PNG Maker allows me to reuse and refine them, which improves efficiency even further.
How PNG Maker Changed My Workflow
Before using PNG Maker, my workflow looked like this:
Search for images
Manually remove backgrounds
Adjust edges
Build composition
Fix inconsistencies
Now, the process is much simpler:
Generate assets with PNG Maker
Use Background Remover for existing images
Compose and refine
The difference in speed is significant. What used to take hours can now be done in a fraction of the time.
More importantly, PNG Maker allows me to focus on creativity instead of repetitive tasks. This shift has improved both the quality and consistency of my thumbnails.
Practical Tips for Using PNG Maker
After using PNG Maker extensively, here are a few tips that helped me get better results:
Be specific with prompts
Generate multiple variations
Use Background Remover when working with real images
Save successful prompts for reuse
Combine AI assets with simple design principles
PNG Maker works best when you treat it as part of a workflow rather than a standalone tool.
Final Thoughts
AI tools are changing how creators work, and thumbnails are no exception. PNG Maker has become a core part of my content creation process because it solves a very specific problem efficiently.
By combining asset generation with an integrated Background Remover, PNG Maker provides both speed and creative flexibility. It removes technical barriers and allows creators to focus on what really matters, which is making compelling visuals.
If you are struggling with thumbnail design or looking to scale your content production, integrating PNG Maker into your workflow is a practical and effective step.
The biggest advantage is not just saving time. It is the ability to experiment more, iterate faster, and ultimately create thumbnails that perform better.